
Previously, we outlined how to create Certificado, an app that uses the Waves blockchain as a database. In this overview, we extend the functionality of Certificado by creating a smart contract for the app.
What is a smart contract?
A smart contract is programming code that is stored and executed on the blockchain. With a smart contract, you can create transparent and automated applications.
A smart contract is a key tool in the creation of decentralized applications, or dApps. In addition to storing data on the blockchain, a smart contract allows you to define an algorithm and application logic.
Smart contract usage
In the tutorial on creating a web app that stores data on the blockchain, we considered the example of Certificado — a service that enables you to save a certificate on a decentralized ledger, which can then easily be checked by any Internet user.
In order to develop the first version, we didn’t need any familiarity with smart contracts. To implement the required functionality it was enough to address the blockchain using Data Transactions and GET requests to the API.
Using a smart contract, we’ll add new functionality to Certificado: a certificate request. An administrator will not be needed to create certificates for all participants. Now, users will be able to request a certificate. After that, the administrator can confirm their request and record the validity of the certificate on the blockchain.
Let’s define the logic of the smart contract, which includes two functions: request and approve a certificate. It’s not necessary to dive into the syntax of writing a smart contract in the Ride programming language.
We’ll consider the steps required for deploying a smart contract. Then, we’ll study how to connect smart contract function calls to a web app written in JavaScript. In other words, how to make a smart contract available to any user, especially for those who are not familiar with the blockchain.
How are smart contracts created?
Code development
You can write code in Ride anywhere, even using Notebook. For the convenience of Waves developers, we’ve created two code writing tools: a plugin for Visual Studio Code and an Online IDE. The IDE is more suited to small smart contracts and experiments. Go to this page to start.
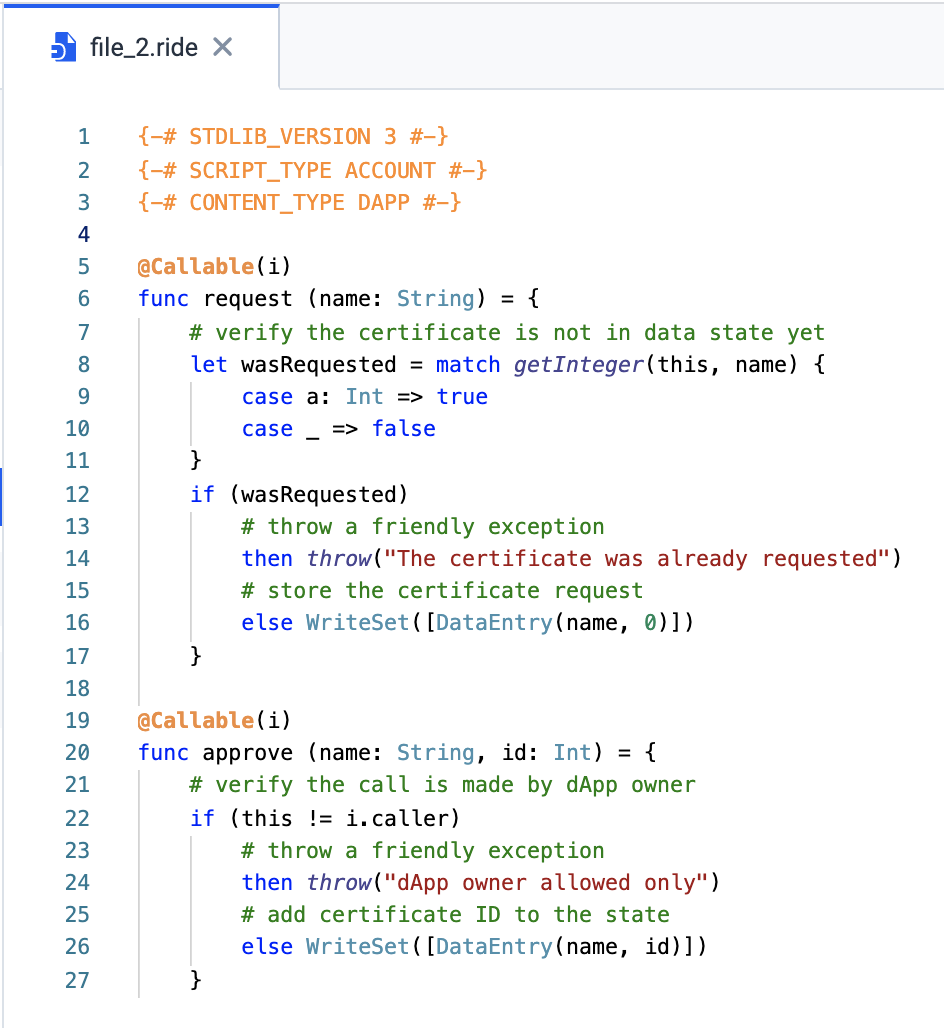
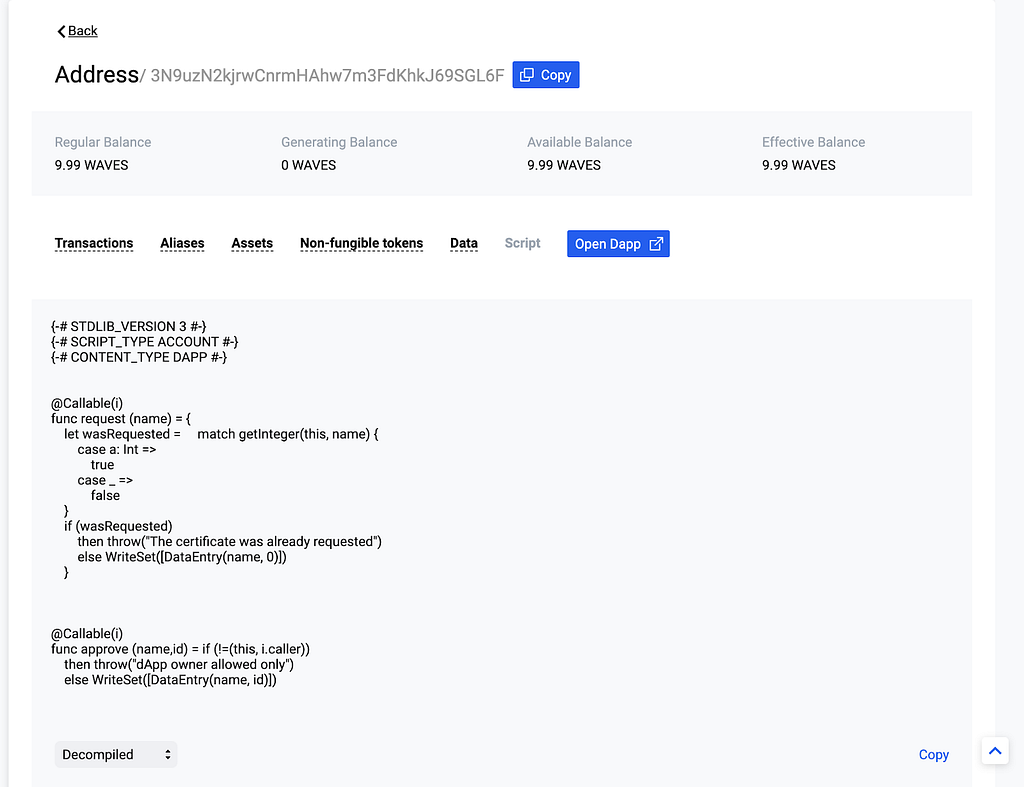
We’ll continue to develop the logic of Certificado. As an example, let’s consider a simple smart contract: certificado.ride.
The comments marked in green describe the contract’s logic. Its functionality is quite simple:
- request(name) function can be called by anyone and adds to the account state a record that a diploma was requested
- approve(name, id) function can only be requested by the dApp owner, which is checked in line 22, and adds to the state a certificate id for the person, confirming its authenticity
As you see, Ride code is intuitive and easy to write. Besides this, the language has several interesting features. For instance, it lacks loops and recursions, which makes it Turing-incomplete. You can learn the syntax and basics of Ride in Inal Kardanov’s Ride introduction tutorial.
Uploading the smart contract to the blockchain
After you’ve written the smart contract in the IDE, upload it to the blockchain. Sign in through your Waves account and click ‘Deploy’.
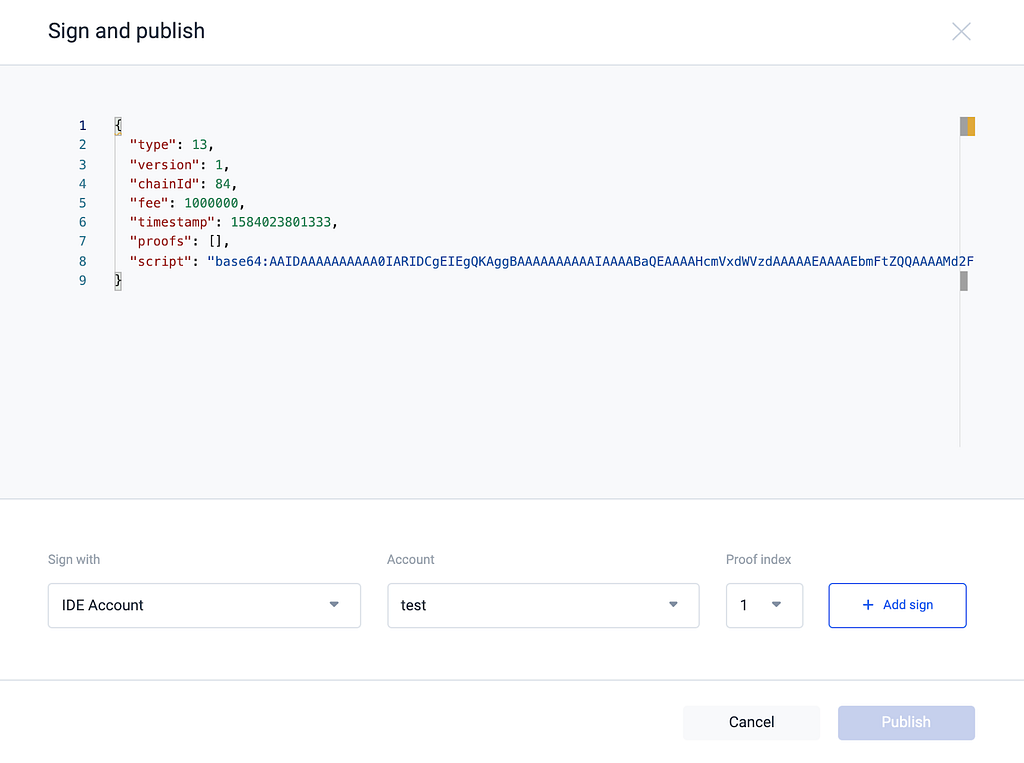
After that, a window with the generated SetScript transaction in JSON format will open and you should sign it.
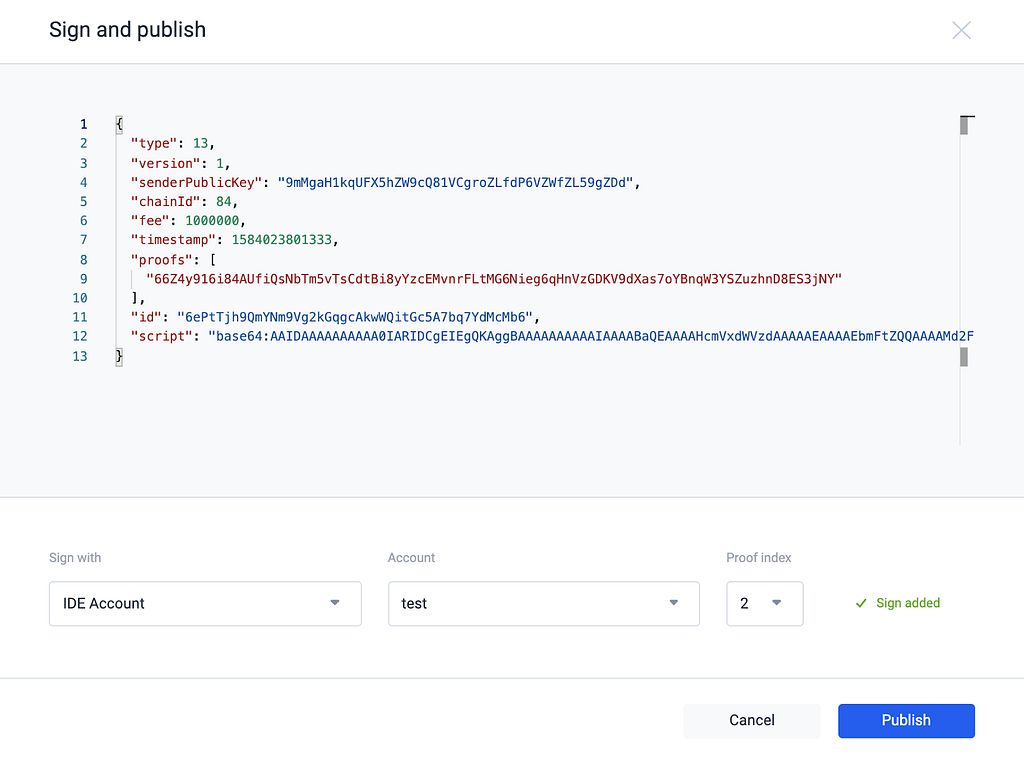
Click on the ‘Add sign’ button. The transaction is now ready to be sent. Now click on ‘Publish’.
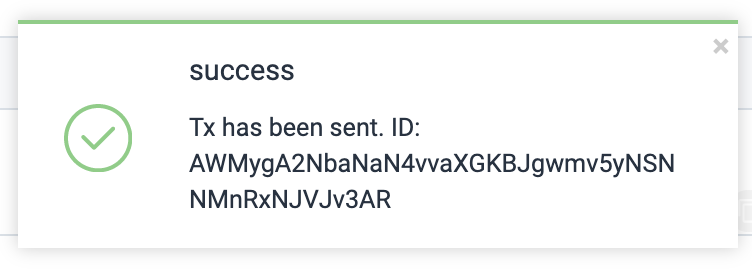
With this transaction, the smart contract will be published and available for calling. Once it’s recorded on the blockchain, the account that sent the transaction becomes a dApp and is connected with the specific script on Ride. You can check this in the Explorer.
Now the Callable functions of the uploaded smart contract become available for calling. Their execution is transparent, because the source code is recorded on the blockchain. Check it out here.
Learn more about the process of creating and uploading a smart contract in Ilya Smagin’s How to Build a Ride dApp tutorial.
How to use the smart contract
We’ve found that the process of creating a smart contract is easy. Using the IDE, this is divided into two simple steps:
- Writing code in Ride
- Sending a SetScript transaction, which contains the code and is signed by the dApp owner
The source code of any contract can be viewed in the Explorer. More interesting is that you can send an InvokeScript transaction and call the smart contract. By calling the smart contract, new data is added to the blockchain or tokens are transferred.
All you need to create a contract is a SetScript transaction. For calling a contract, you only have to perform an InvokeScript transaction, which is sent to the blockchain in any available way. See the documentation for more details about the structure of this transaction.
There are several options to provide an interface for sending InvokeScript transactions to make a smart contract available to all users, not just those who know how to manually sign JSON and send it to the blockchain.
Calling a smart contract via an auto-generated interface
Waves-Dapp.com is a service that allows you to automatically generate an interface for a dApp using the names and data of the arguments of Callable functions.
The interface for a new smart contract looks like this:
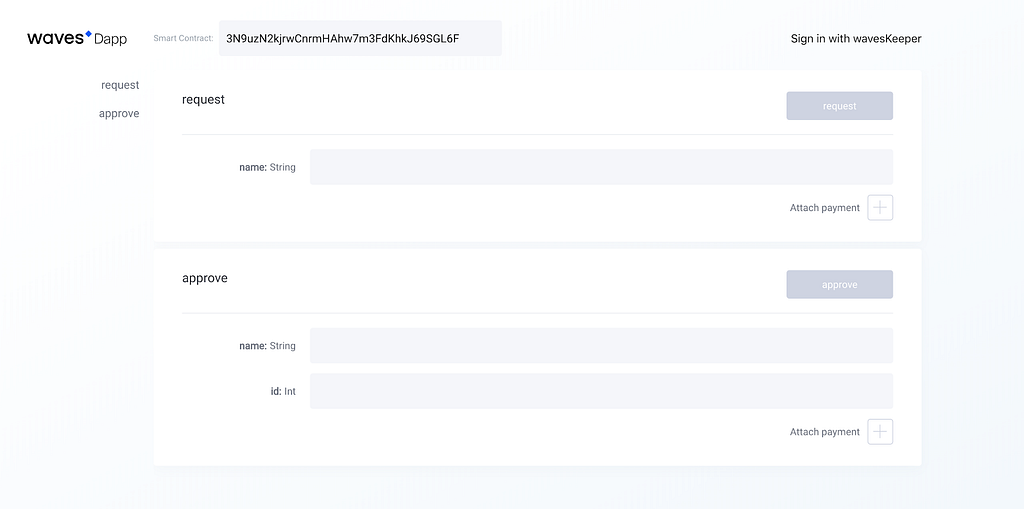
This page is accessible through this link. The developer can provide an interface for calling a smart contract. The user only needs to go to the page, select and call the function by entering the values of the arguments.
Creating an interface to use a dApp
In most cases, in addition to a smart contract, developers create a separate web application enabling access to the smart contract for those who are not familiar with the blockchain and the Waves-Dapp service.
This involves:
- Creating a standard interface with HTML
- Allowing the user to sign and send InvokeScript transactions, using JavaScript and Waves Signer or Waves Keeper
Let’s update the Certificado app by changing the logic in the index.html file so that any user can request a certificate. Since the previous version used Waves Keeper, the easiest way is to change the transaction structure: see index.js.
We are changing the sendData function so that it will initiate the sending of an InvokeScript transaction by a user. We’ve extended the example functionality so that any user with Waves Keeper installed can request a certificate. Only the dApp owner can validate the certificate, by calling the approve function. For this purpose, an automatically created Waves Dapp interface is used.
To set a lower entry barrier for users, it’s better to use Waves Signer instead of Waves Keeper. This tool allows signing transactions without setting up a separate account on Waves.Exchange. You can find out how to use Waves Signer in your app here. (We used Waves Keeper because work on the application was already under way before Waves Signer was announced.)
Conclusion
A Waves smart contract is code written in Ride, uploaded to the blockchain via the SetScript transaction, and executed by any blockchain user through the InvokeScript transaction. To make calling smart contract functions more convenient, you can create an interface using JavaScript and Waves Keeper API (or Waves Signer).
Why are smart contracts important?
A blockchain is a database that allows you to store data transparently and securely. Smart contracts are transparent and securely-stored algorithms that can be called by users. Using a smart contract, you can implement any program logic that addresses blockchain data. Smart contracts are important because the data is not just stored on the blockchain, but can also be changed using transparent logic.
Hopefully this article has helped make the development of smart contracts simple and convenient. If you want to discuss a technical issue in detail, please ask in the developer chat on Telegram.
References:
- Part I of this tutorial: Vladimir Zhuravlev — How to build your first blockchain-based app in 15 minutes
- Ride basics: Inal Kardanov — Ride introduction
- Ride dApps tutorial: Ilya Smagin — How to Build, Deploy and Test a Waves RIDE dApp
Read Waves News channel
Follow Waves Twitter
Watch Waves YouTube
Subscribe to Waves Subreddit
What are Smart Contracts and how to use them in your app was originally published in Waves Platform on Medium, where people are continuing the conversation by highlighting and responding to this story.