I have prepared a tutorial on how to create a dApp on the Waves blockchain. Read on for a step-by-step process of development, with screenshots.
Why build apps on a blockchain?
Blockchain is a way of decentralizing data storage. The technology can therefore be used as a substitute for a traditional database. Blockchain provides functionality that can be useful in building an application’s architecture, including transparency of operations and, of course, this decentralized data storage. Data on a public blockchain cannot be changed and can be easily checked by any internet user.
In this tutorial, we’ll create a web app that uses blockchain instead of a centralized database, using native JavaScript and the well-known HTML with CSS. Let’s explore in practise what the features of the technology are, and how to use them in your development.
What are we going to develop?
We’ll consider the Certificado project as an example of a blockchain-based app. The project aims to solve a real-world problem — forgery of certificates of education. For instance, documents can easily be forged in Adobe Photoshop, and this makes certificates lose their value. It is easier to create a certificate using the software and add it to your CV portfolio than to take a course on Coursera, for example.
The mission of Certificado is to add value to certificates issued online, with two features:
- Transparent storage of certificates on a blockchain
- Only administrators can add certificates to the database
How are we going to build the app?
This will be a classic web app built using HTML and JavaScript, addressing the blockchain to store diploma data. We chose the Waves blockchain with an additional tool, Waves Keeper. This browser extension allows an administrator to login without disclosing his private key (a password, in the world of blockchain).
Certificado is not a decentralized application (dApp), since business logic is not fixed in a smart contract. The app simply uses the blockchain for data storage and no smart contracts are needed.
Step-by-step overview
Certificate creation interface
Let’s start with the classic part — interface creation. Lay out two pages: index.html for adding certificates and check.html to validate a document.
index.html layout:
https://gist.github.com/vlzhr/37e8b19d69acdf30078421e97f23b9d0
The next step is to implement the mechanism for adding a diploma. For that, we’ll figure out where to add the diploma. Now, it’s time to get started with the Waves blockchain!
Install the Waves Keeper browser extension to create and manage your accounts on the blockchain.
Waves Keeper — connecting to the blockchain
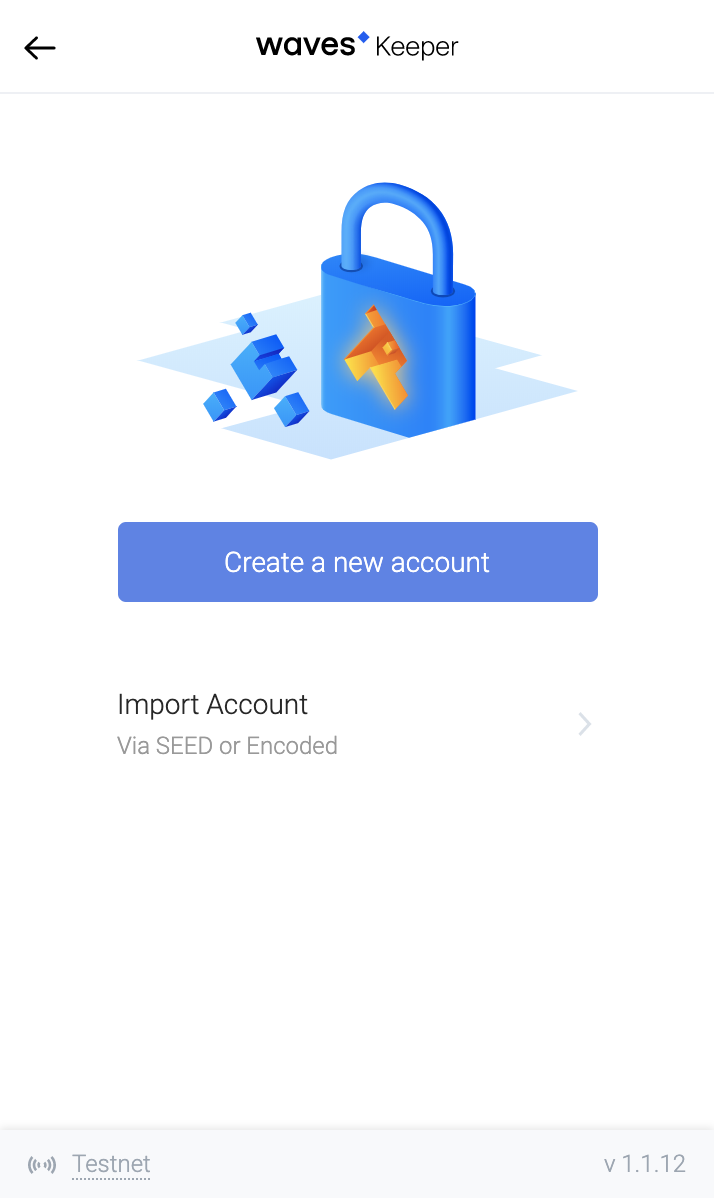
Click on the ‘Create a new account’ button. Check that you have chosen testnet in the bottom left corner. This network allows the use of test WAVES tokens so you can experiment with transactions.
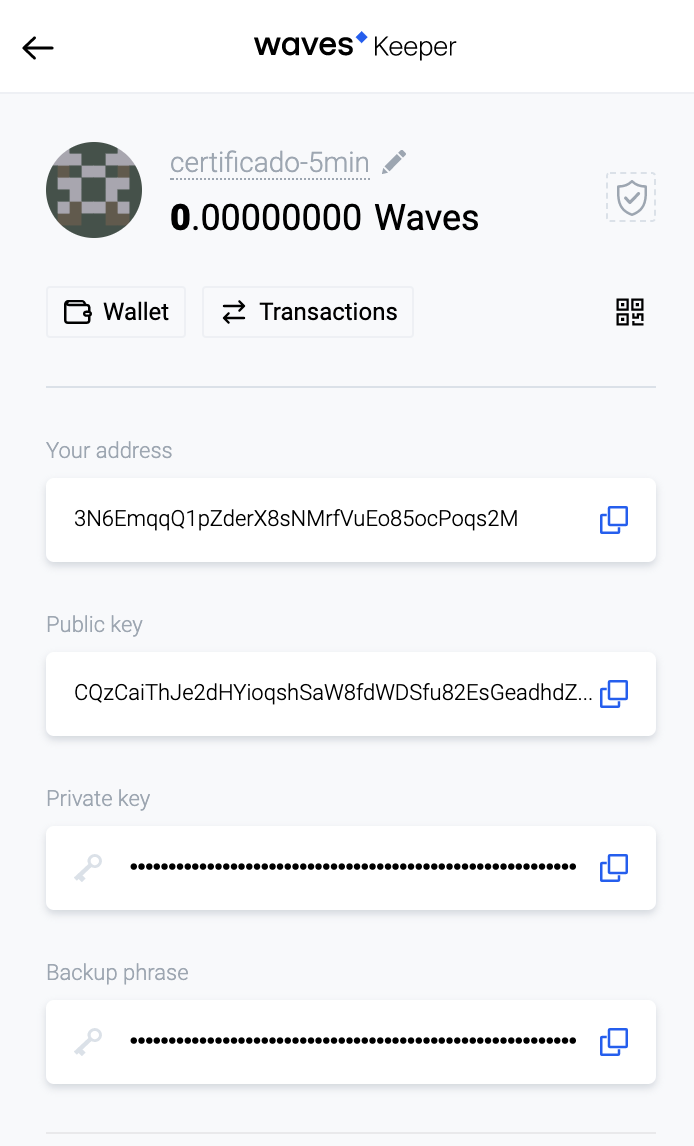
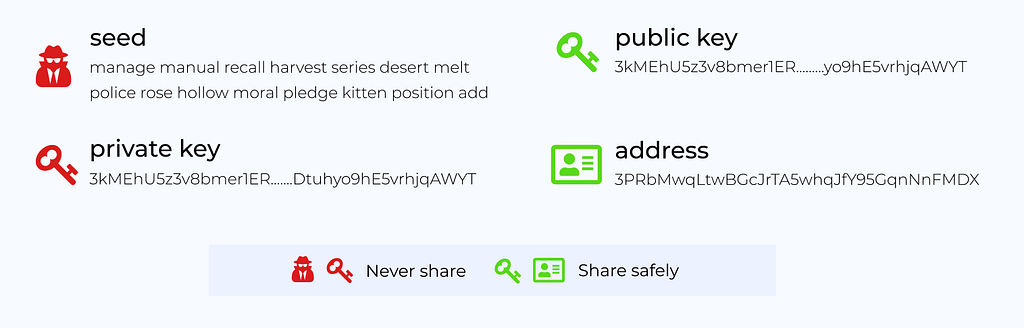
This page will be available after account creation. Please note that the account has four fields: an address and a public key used for identification on the network, as well as a private key and a seed phrase that acts as a password. You must not reveal your private key or seed phrase! That’s why the symbols are hidden with asterisks.
The upper part of the Waves Keeper window displays your balance. At first, this will be a depressing zero. Let’s fund the account via Waves Faucet, which issues test tokens. Click on the ‘Transactions’ button and move to Waves Explorer:
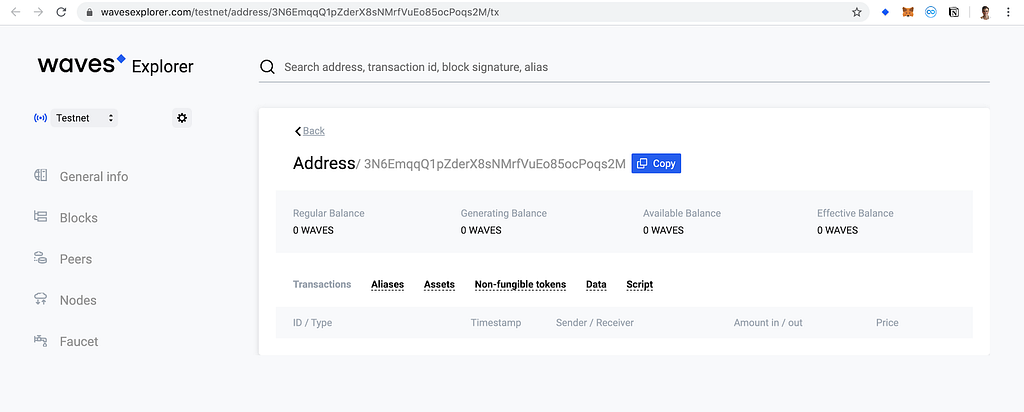
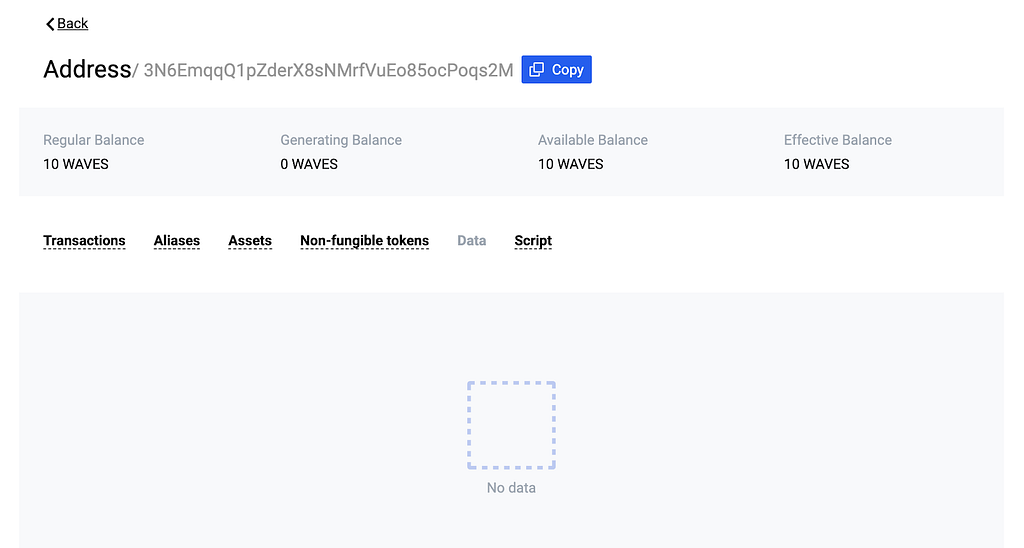
This tool displays all blockchain data in a convenient form. All the information about your account is on the page. There’s nothing interesting so far, neither transactions nor balance. Later, you can easily track changes here. Anyone can do this with Waves Explorer!
In the bottom left corner you can go to the Faucet page:
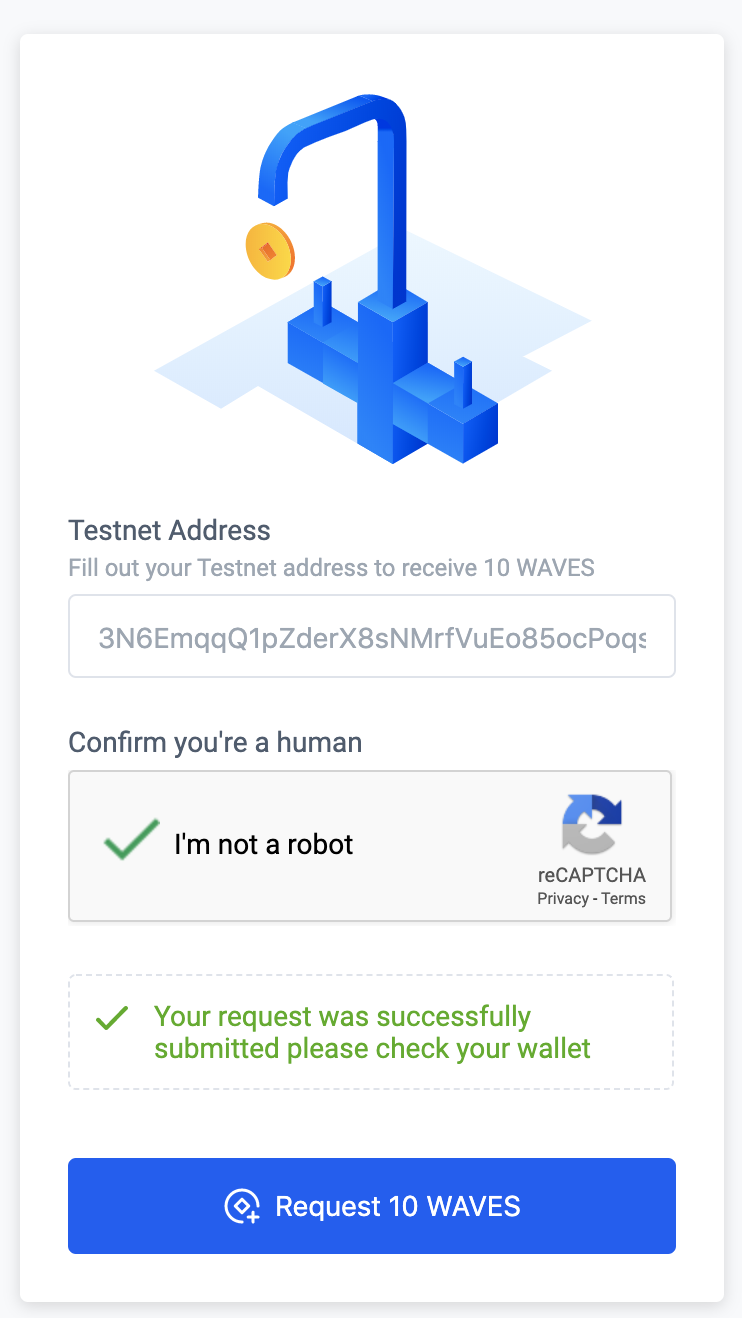
Enter your account address and prove that you’re not a robot. Then you’ll receive 10 testnet WAVES on your balance:
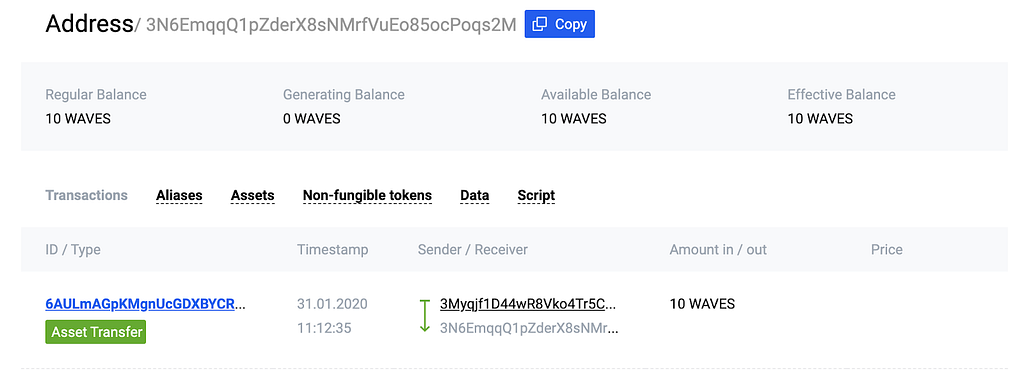
Now we have some tokens for experimenting! Let’s continue with the most interesting part and teach our app to communicate with the blockchain. In our already created account, you can save data using its Data State. Right now it’s empty:
We can change account data using transactions. This isn’t a problem since Waves Keeper has an API for such tasks:
https://docs.waves.exchange/en/waves-keeper/waves-keeper-api
But before we move on to studying the API, we need to understand one of the key elements of a blockchain — a transaction.
A transaction is a record of completing some action. For instance, money transfer is a transaction. Issuing a new currency is a transaction. And just recording data is also a transaction! There is a specific transaction type for each type of action.
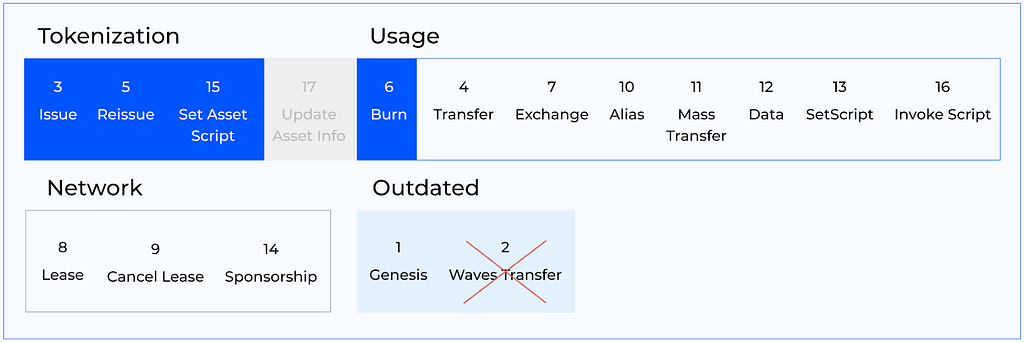
We are interested in type 12 — Data Transaction — in the picture above, because our goal is to store data.
Sending certificates to the blockchain
We use Waves Keeper to send the transaction.
Transaction sample in Waves Keeper:
https://gist.github.com/vlzhr/4c2015f1c614b656826a3622d786c084
We create a click handler on the ‘Add diploma’ button to store data about the document in the transaction.
sendData function:
https://gist.github.com/vlzhr/448a0a26072960a80ef60ce4d4151ac6
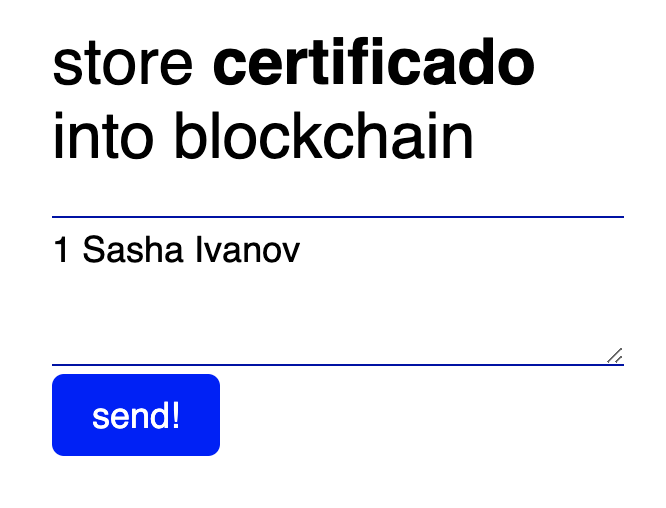
Now, when the user clicks the ‘Send!’ button, he adds a certificate to the blockchain using Waves Keeper:
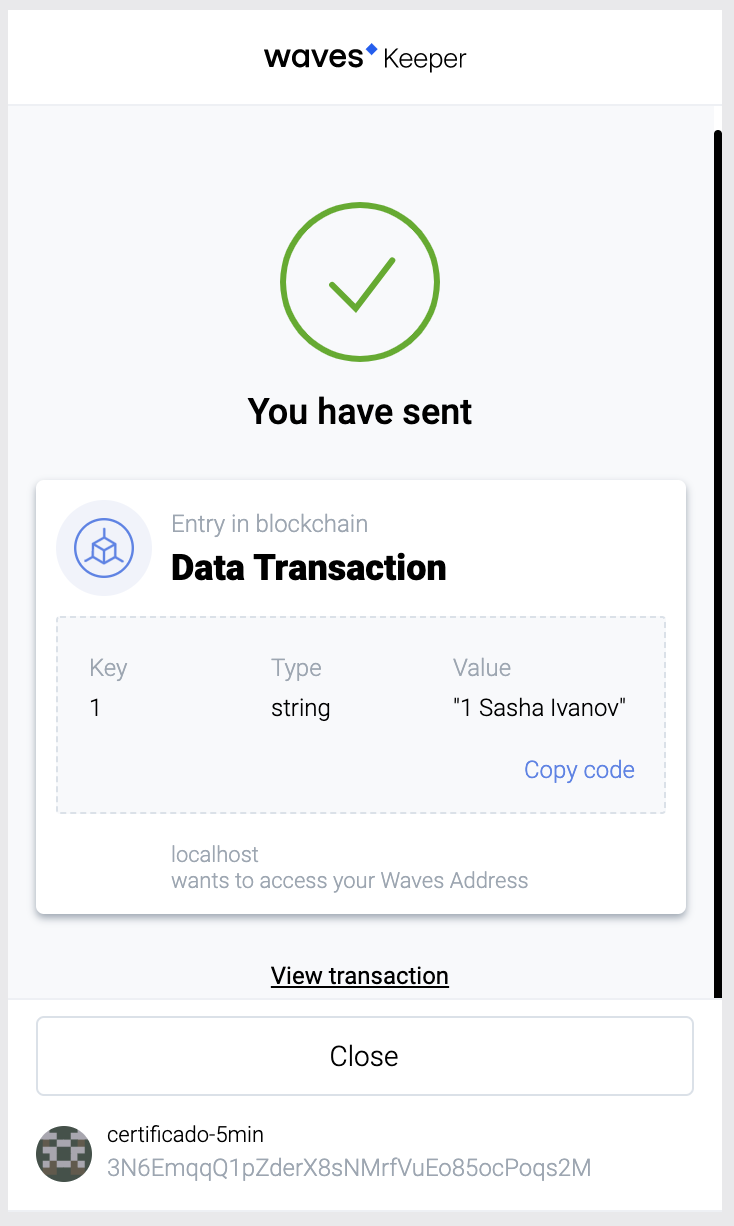
After you enter a password for the extension, you will see information about the transaction and a request to sign it:
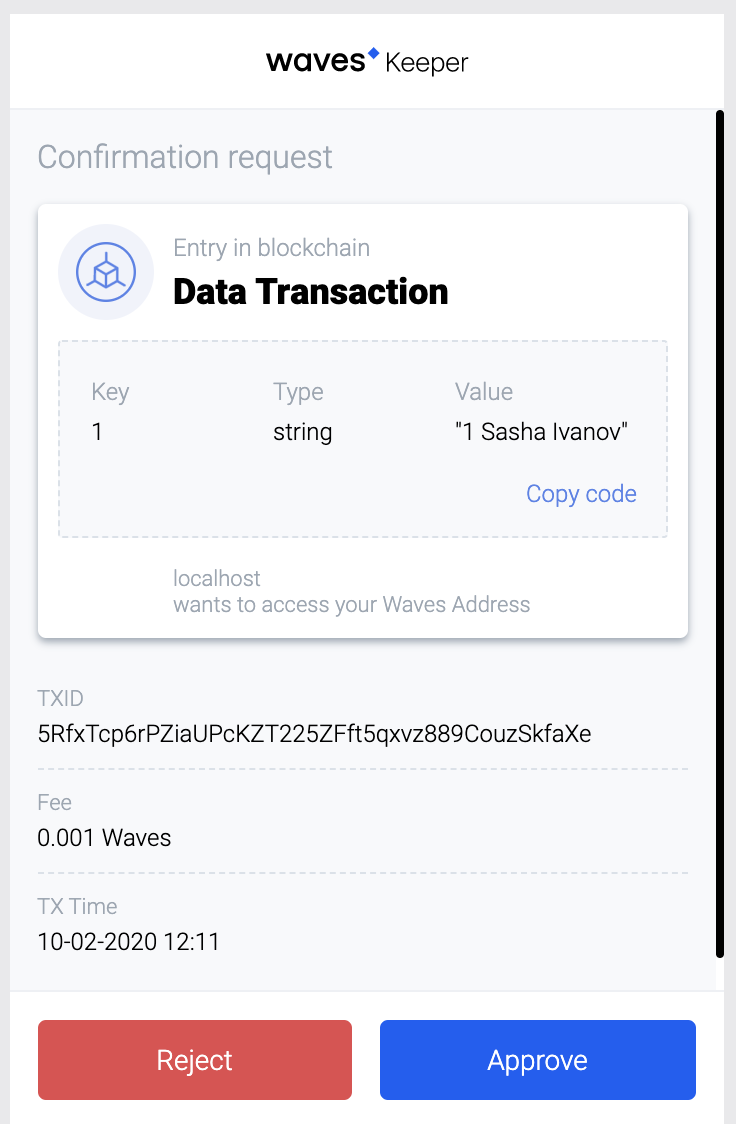
What information about the transaction do we see? First of all, the Data Transaction type, meaning that the aim of the transaction is to send data to the blockchain. We see the data itself: under the key ‘1’ the user saves the name of a diploma holder with its number, ‘Sasha Ivanov’. Also, we can see a unique transaction id and the fee for sending such a transaction to the blockchain.
Transaction sent! That means at least three things:
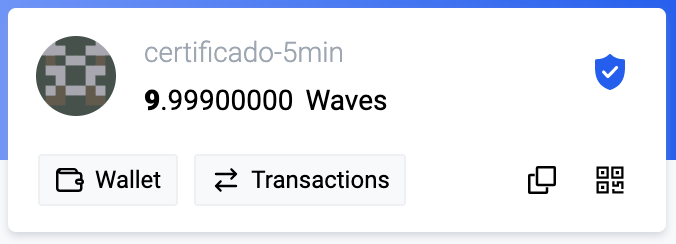
- The account balance has decreased, since 0.001 WAVES was spent on the fee.
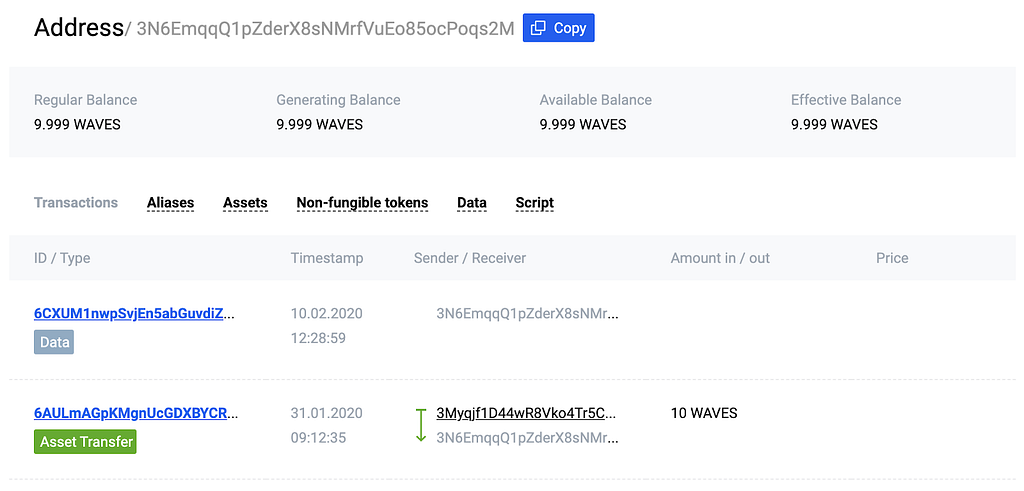
2. A Data Transaction was added to the transaction list on the Waves Explorer account page
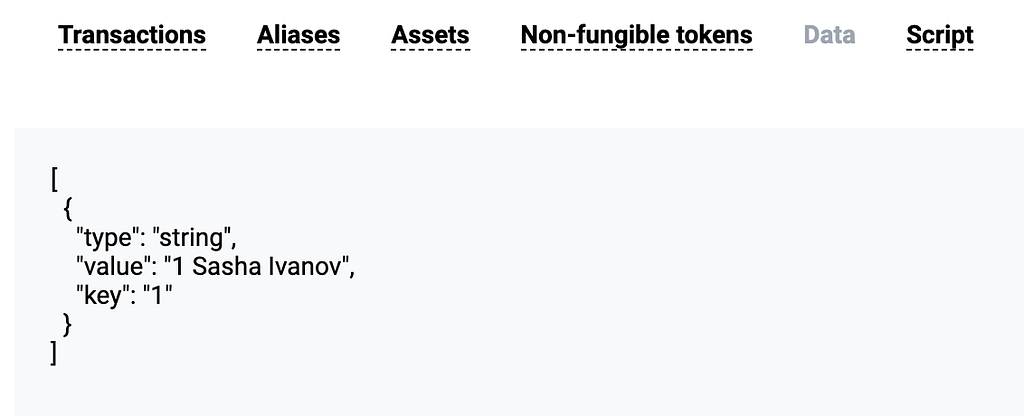
3. The certificate is displayed under the Data tab. The certificate ownership of number 1 by Sasha Ivanov is fixed in the blockchain. No one can hide or change this information.
Verification of certificates’ validity
We’ve created an app that allows an administrator to issue certificates. Waves Explorer displays certificates recorded on the blockchain.
However, it is more convenient to verify the validity of a diploma using a separate form, without the need to use Waves Explorer. Let’s create an additional page for this form!
check.html layout:
https://gist.github.com/vlzhr/e7e7c849980f19e49fae84a20b1ddb0c
The simple layout allows us to create a user-friendly interface, helping anyone to check the certificate’s validity and to verify it definitively with Waves Explorer:
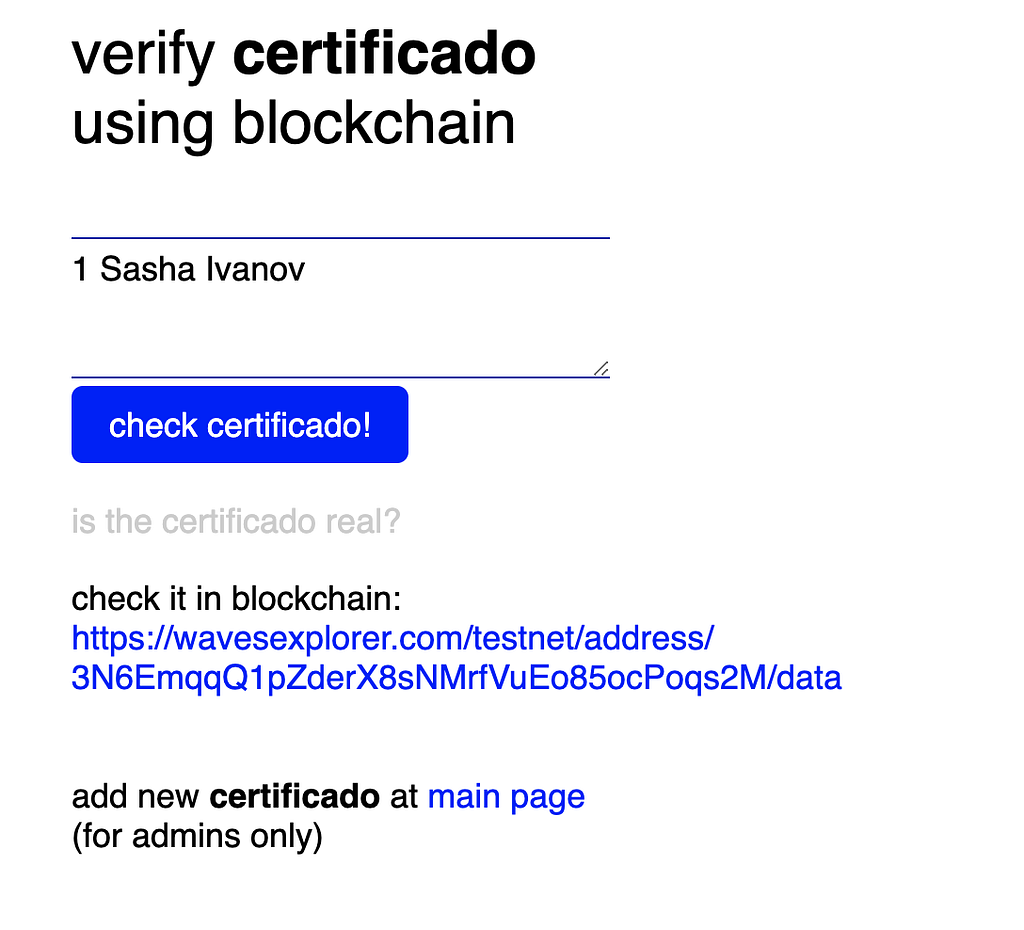
All we have to do is make the ‘check cerificado!’ button work. Let’s add the checkData() handler:
checkData function:
https://gist.github.com/vlzhr/b2b455a4de8e19d44ccff03b90478dfe
The main point is to send a GET request to the blockchain API:
https://testnodes.wavesnodes.com/addresses/data/3N6EmqqQ1pZderX8sNMrfVuEo85ocPoqs2M.
Requesting this API method enables us to receive a set of data that lies in the account’s state from the Data tab in Waves Explorer. You can see a set of available API methods for the Waves blockchain here. With the available functionality you can, for instance, add transactions, read data and receive token data.
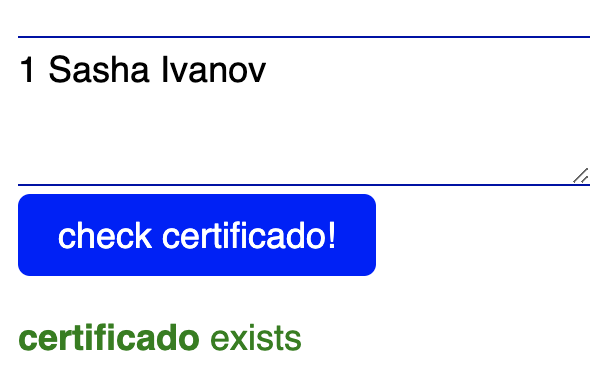
By adding the ability to receive data from the blockchain in our app, we’ve created a form available to any website user. Everyone can check the diploma’s validity for free since there is no fee for reading the data.
Extra task for user experience
Finally, our app has two pages for adding and verifying certificates! The last point to implement is the ability to share the link to check your certificate.
Certificate sharing functionality:
https://gist.github.com/vlzhr/8fc5394215b14e5b599c65edf1bf4dfc
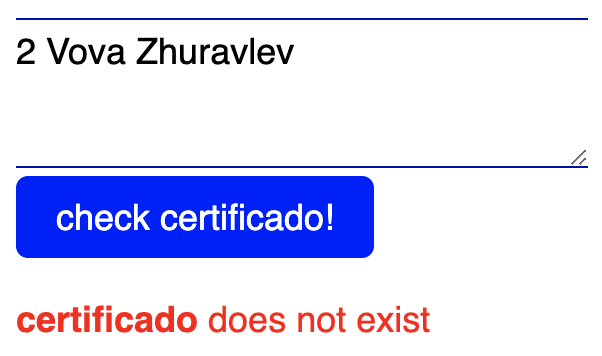
The certificate validation link can be sent so that the verifier does not need to fill out the form. A link like ‘URL/check.html?2 Vladimir Zhuravlev’ is enough for the form to be automatically filled in with the relevant data, 2 Vladimir Zhuravlev.
Conclusion
In fairly brief terms, we’ve implemented Certificado, our full-fledged web app. Blockchain can be a convenient and reliable way to store data, and Waves Keeper and Waves Explorer are great tools for working with it, which should be integrated into your app.
Using a blockchain instead of a regular centralized database, you can add unique functionality to an app and improve its value to your users. There are lots of tools to simplify the development process in the Waves ecosystem. In addition to Waves Keeper and Waves Explorer, we have Waves Signer, client libraries for different programming languages and the Ride programming language for smart contracts.
Develop apps on the Waves blockchain, join our developer community and ask any questions you have in the Telegram chat!
Read Waves News channel
Follow Waves Twitter
Watch Waves YouTube
Subscribe to Waves Subreddit
How to build your first blockchain-based app in 15 minutes was originally published in Waves Platform on Medium, where people are continuing the conversation by highlighting and responding to this story.